
Welcome to the tips page. We call it that because there are no rules in photography there are only suggestions and guidelines. Please read the following with an open and creative mind. Above all else experiment and have fun. If your not having fun that will probably come through in your photos. Don't be afraid to make mistakes they're the best way to learn. Now let's get started.
THE TIPS PAGE

- First of all FOCUS
- On the opening page we stressed the importance of a sharply focused photo. In 99% of the photos you take a sharp focus is the one thing you don't want to overlook. However, there are those times when you will want very slightly out of focus picture. This is where you judgement comes in. Focus is one of the things you can manipulate for the sake of creativity. It's your call. What are you trying to get across in the photo? Soft focus can convey innocence or serenity, but beware there is a very fine line between soft focus and out of focus. With that said, the other 99% of the time sharp focus is the way to go. Todays auto-focus cameras make this very easy. But these systems can be fooled, so be aware. If your shooting through a window the camera will want to focus on the glass. If there's something too close to the lens for you to see through the viewfinder that may be what the camera is focused on. What's important to remember is, always be aware of what your subject is and be sure that your focus is set on that. Most of the time it is better to have your subject not quite centered in the photo. This actually adds some drama to the photo in most cases. p The problem is your cameras focus is measured at the center of the viewfinder. What now? Well auto-focus cameras usually have a two position shutter release button. Push it half way down and it focuses. Push it the rest of the way down and it releases the shutter. This allows you to put the subject in the middle of the viewfinder, push the shutter release half way down to focus and then as you hold the release down you can recompose the photo. Holding the release down maintains the focus regardless of where you point the camera. One final point on focus. If your using a long lens-80mm or longer-focus can be tricky. The best tip for this is to zoom all the way in on your subject to focus and then while holding the focus, zoom out to where you want and take the picture. If what your taking a picture of is too far away for your camera to focus on then you can either turn off the auto-focus and do it the old fashioned way or just set your focus to infinity.
- What is the SUBJECT of your photo?
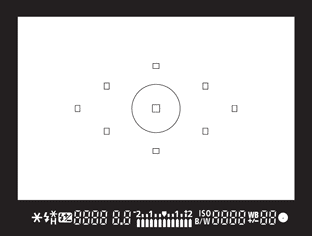
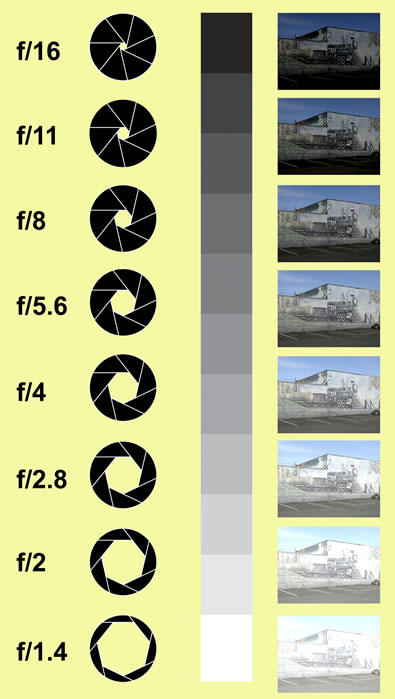
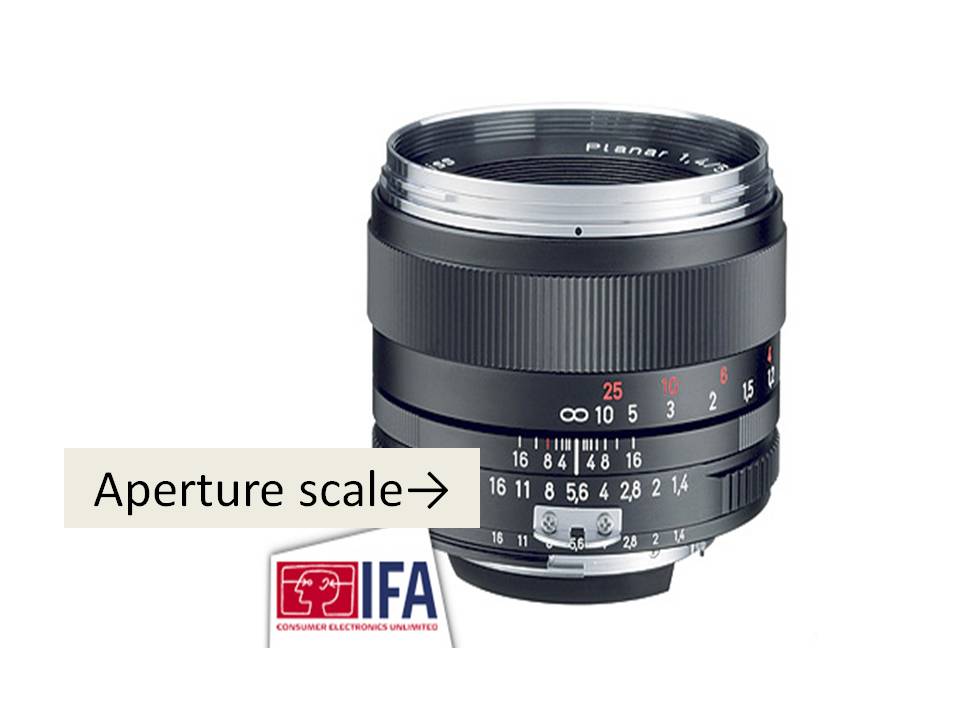
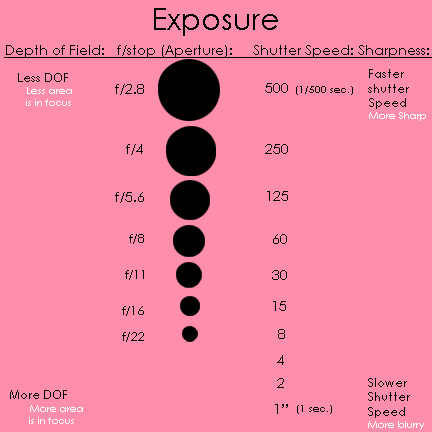
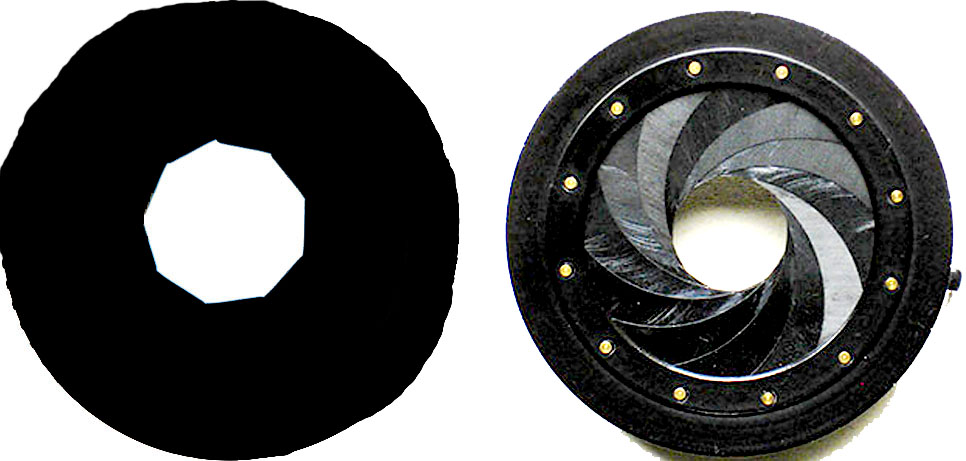
- If you click on the photo to the right you will see a picture with no clear subject. Can you tell what the photographer was trying to take a picture of? When someone looks at your photos there should be no doubt as to what you are taking a picture of. What is the subject? Focusing attention on your subject can be done in several ways. One way is to set your focus so that only your subject is in focus. This can be achived by using your largest aperture or smallest f/stop. The link will show you a normal aperture scale on a lens. F/stops are f/16, f/11, f/8, f/5.6 and so on. With f/stops the smaller the number the larger the aperture. A large aperture will give you the shallowest depth of field. Depth of field is the point at which things come into focus to the point where they go out of focus. If things come into focus at 10 feet then at f/2.8 they will go out of focus at 15 feet. At f/11 they will go out of focus at 20 feet. Therefore if you set your f/stop at f/2.8 very little will be in focus other than the subject your focus is set on. Another way to focus attention is to fill the frame with your subject. In any case the point is to remove from the picture anything that will distract the viewer. Make it unmistakably clear what your taking a picture of.
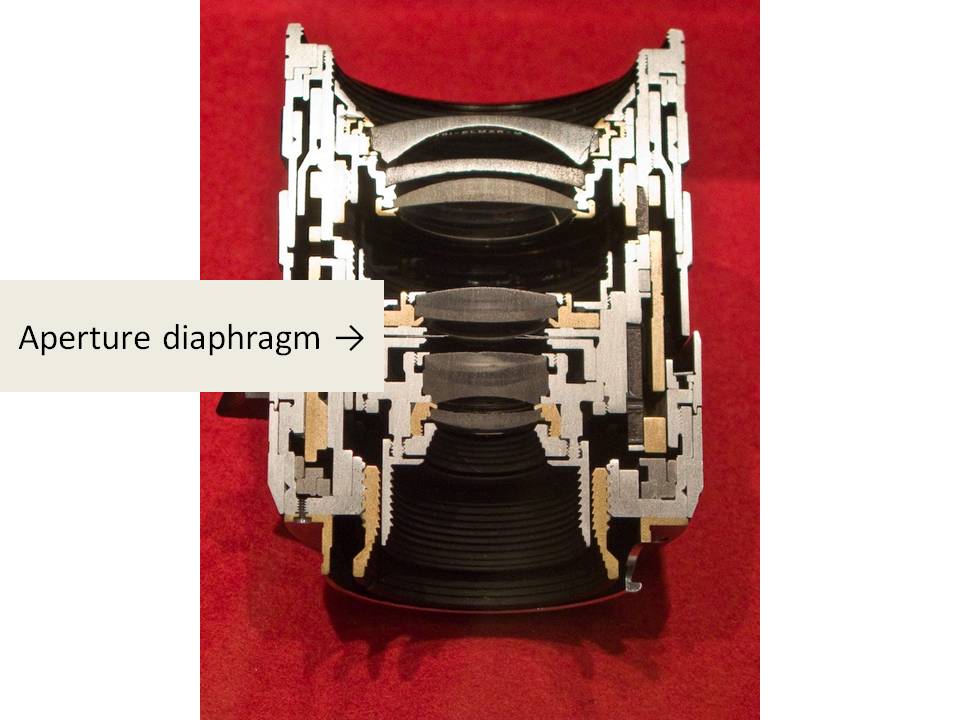
- Last but certainly not least is the EXPOSURE
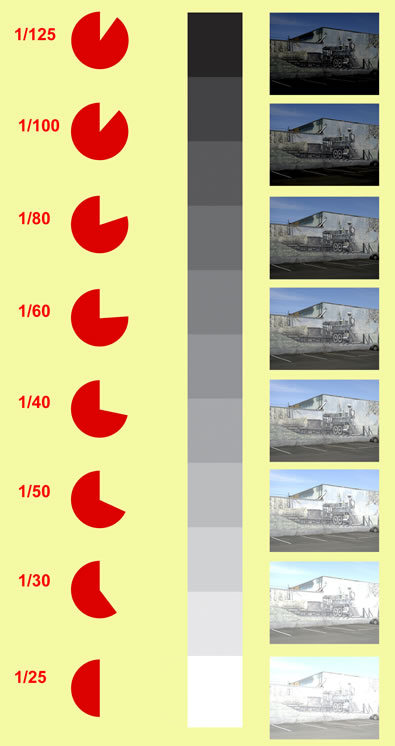
- Simply put, exposure is the amount of light allowed to reach the medium. Click on the photo to the right and you will see that too much light was allowed to reach the medium. I believe that in this instance this was a creative choice, but it is a clear example of overexposure. Exposure is controlled in two ways. First by the aperture, that is the size of the lens opening. Inside of the lens is a diaphragm. The opening of this diaphragm is controlled by the aperture ring on the lens. By closing this diaphragm down you reduce the amount of light reaching the medium. The second way is the shutter speed. This is the amount of time that light is allowed to reach the medium. On older cameras this is controled by a dial on top of the camera body. On newer cameras both of these adjustments are a menu choice. Shutter speeds are listed in parts of a second. 60 stands for 1/60th of a second. These increments are 15,30,60,125,250,500, and so on. There is a direct corellation between shutter speed increments and f/stops. one increment of either one will either double the exposure or half the exposure. This means that an exposure of f/11 @ 1/60sec. is equal to an exposure of f/8 @ 1/125sec. This may all seem a little confusing right now, but you will need to learn these adjustments in order to manipulate exposure. For instance, if you are trying to photograph something that is moving you will need to expose at at least 1/125sec.,but that may not be enough light for a proper exposure so you will need to open your aperture to compensate. Don't worry with a little practice it will become second nature in no time.
- Your rights as a Photographer
- The legal issues surrounding photography include copyright, privacy, and even national security. We highly advise you to become aquainted with the laws as they do differ from state to state. The link to the right is a general summary of your rights in PDF format, however we suggest that you check with the state.gov, for the state your shooting in, for a more specific explanation of local laws. Rights

